Showing posts with label Icicle Border. Show all posts

Thursday, September 22, 2022

Snowman Shaker

Hello Scrapping Cottage Friends

We have a NEW RELEASE FOR AN EARLY START ON YOUR CHRISTMAS CARDS!!   The collection is Christmas Part 1 and has 21 fantastic dies. The release includes everything from Gnomes to Reindeer!! Check it out HERE it is on sale now!!

The die I am creating with today is Snowman w/Tree. I made a shaker card with this cute little guy! It seems like young and old love shaker cards!


Design Steps:

1.  Cut a piece of white card stock 4 1/8 x 5 3/8 and a piece of red snowflake DP 4 x 5 1/4.  Glue the two pieces together and then cut the square for the shaker window (I did it slightly to the left of center).  The shaker window is 2 1/2 by 2 1/2 so I used my Pierced Square die 3rd from the largest to cut the opening  
2.  Place the plastic window in the hole and fill it with your shaker pieces.  Use glue or tape to seal the shaker with a pieces of glitter white paper measuring 2 3/4 x 2 3/4
3.  Glue the whole shaker panel to the white A2 card front
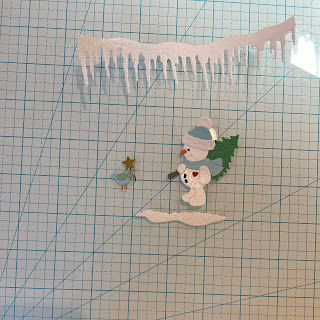
4.  Using the Snowman w/Tree die cut out the pieces in: white glitter card stock, green, blue, red, orange, black, mint and gold.  Assemble the pieces with a fine tip quick drying glue and set aside 
5.  Cut the icicles using the Icicle Border die on white glitter card stock.  Adhere the border to the top of the card using foam tape.  Place dimension dots to the back of the snowman, bird and ground then pop him to your card front as shown below.  Stamp your senitment and heat emboss with clear powder.  Glue the sentiment flat to the card front and your card is complete

CottageCutz Products


We have more inspiration on our YouTube Channel check it out HERE

Thanks so much for stopping by!  And I will see you next Thursday.

Blessings and Take Care


Wednesday, December 04, 2019

I Can Nearly Wait til Christmas!

Hello!  This is Sukie and I'm back for my design team post with this sweet Christmas card.  I used two die sets from the new Black Friday die release for my card.  These dies are still on sale over in the store.
I cut out the adorable polar bears from the Arctic Polar Bear & Cub and Arctic Moose & Polar Bear die sets.  I cut out an extra scarf so all three bears would have a scarf.  I also used a left over piece from the Icicle Border die set and cut it into two pieces.
I created the card base with a snowflake paper layered with some patterned paper.  The icicle border was adhered along the top edge with the thinner scrap added along the bottom edge. Everything was matted on a black card base.
The first polar bear was placed on the left side of my card and the other two bears were added on the opposite side.
I heat embossed a sentiment from the Scrappy Moms (retired) Winter Wishes stamp set on a hand cut flag.  The sentiment flag was placed above the polar bear as a finishing accent.
Here are the die sets used on my card, available in the store:

Wednesday, November 20, 2019

Be Merry

Hello!  This is Sukie and today I have a fun and festive card to share for my design team post.  I went with a non-traditional color theme for this Christmas card.
I used a total of 4 different die sets to cut out all the pieces for my card.   The snowflakes are from the Santa Over Christmas Town set and the reindeer is from the Silly Holiday Reindeer die set.  I opted to use the Springtime Window for my card even though the reindeer coordinates with the Winter Window which I used on this card.  The Icicle Border was the final die piece for my card.
The reindeer was nestled inside the window and icicle border was trimmed on the edge to fit along the window sill.  I stamped a sentiment from the APB Merry and Bright stamp set on a hand cut flag.
I created my card base with a non traditional color theme which definitely has a winter vibe.  The snowflakes were scattered on the base of my card.
The reindeer and window was the next element added to my card. The window was adorned with the icicle border completing the winter scene.
The sentiment was placed below the larger snowflake as the finishing touch on my card.
Here are the dies used on my card available in the store:

Monday, September 25, 2017

Frankenstein Says Hello

Hello Scrapping Cottage friends! Thanks for taking the time to stop and visit today. It's Mary Marsh here bringing you the Monday edition of the Blog.

Well the Fall season is here officially as of Friday, September 22.  With Fall comes thoughts of harvest time, pumpkins, hay rides and of course Halloween.

CottageCutz has a new release of Halloween & Christmas dies that are now available in the online store for ordering.  So if you have made a wish list, now is the time to get it fulfilled.
.

My card today is using some of the new dies: Frankenstein & Ghost Owls and Halloween Phrases & More. So let's get started with some details on how I created my card.


When I saw this Frankenstein Owl die, I immediately knew I was going to make a card for my husband. I call him Dr. Frankenstein sometimes- jokingly of course. He was filling his gas blower in our garage once and the smell filled our entire house. Hence the name was borne for him (lol)!!So he will get a chuckle out of this card as well.


Step 1: Selected my card colors. I found some double sided designer paper in my stash from an old Halloween collection. I liked these patterns and thought it would work well for the layout I had in mind.
 
Green Card Base: 4 1/4" x 5 1/2"
Designer Paper: 4 1/8" x 5 3/8" (cut in half)

Step 2:  I cut my Frankenstein Owl in a light, medium and dark shade of green. He is such a little cutie.
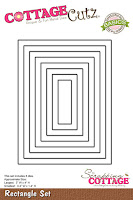
I also cut a rectangle- used 2 different sizes and layered them together on my cardstock to get a wide frame.
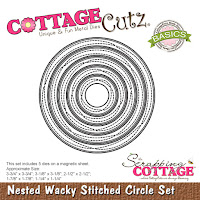
 I did the same with the wacky stitched circle to get a wider frame. To connect the layers together, I used the CottageCutz icicle die. I thought it would work for the drippy goo you see on Halloween cards.
I cut my hello word from the CottageCutz Hello Spring die in a pumpkin shade. The pumpkin is part of the Halloween Phrases & More die.
Step 3: Attached the rectangle and circle to the card base. The rectangle is on an angle- just for some added interest.  
I changed the color of the drippy goo to a pumpkin shade. The designer paper has this cinnamon shade in it but its not a lot and I didn't think it was a good match on my card.
My Frankenstein Owl is popped up with dimensional adhesive. Attached the hello word and my pumpkin to the rectangle corner.

To complete my card, I stamped the friend word and scattered a few orange sequins. I hope I have given you some inspiration on a way to use this cute new owl die. It will be available in a few days.
I will be back this Saturday with another sample card with the new dies. So until next time...........inky hugs

Dies I used to create card:

 
http://www.scrappingcottage.com/cottagecutzhellospring.aspx
 
http://www.scrappingcottage.com/cottagecutzcirclesetbasics.aspx

http://www.scrappingcottage.com/cottagecutzrectanglesetbasics.aspx
http://www.scrappingcottage.com/cottagecutznestedwackystitchedcircleset.aspx
http://www.scrappingcottage.com/search.aspx?find=icicle+border


Tuesday, November 25, 2014

Black Friday 2014 "In the Woods" Release/Preview Day 5

Hello CottageCutz Fans! 
Today is day 5 of our Black Friday Previews for the CottageCutz "In The Woods" Release. We hope you have been enjoying all the Design Team projects so far.

We are super excited to be sharing with you 8 days of previews for the 
CottageCutz BLACK FRIDAY "In The Woods" Release! This Release consist of 14 New CottageCutz Dies & and will be on SALE for an AWESOME Price for Black Friday!!! For each day through Friday the 28th, the CottageCutz Designers will be showcasing different dies from this Beautiful New Release! You wont want to miss this Release!

For my card today I am showcasing the CottageCutz "Moose & pine Trees" die for image, "Icicle Border" and "Season's Greetings" sentiment die. 
First, I cut all images out. Then, I glued all cut images on background of card. The Moose border I cut two times. From the second time I used two deers and trees. Just added foam tape to make dimension on card.

Decorated card with metallic ribbon with button and rhinestones.

Be sure to join us Tomorrow for 
another Preview of this Darling "In the Woods" Release!

Thank you for stopping by! Olena