Showing posts with label The Scrapping Cottage. Show all posts

Wednesday, December 13, 2023

Using Up Odds and Ends


Happy Wednesday, friends.  It's time for another CottageCutz YouTube Video.  I don't know about you, but my craft room looks like a bomb went off in it.  I have been happily crafting away, but honestly, not putting things away.  This left me with a pile of Christmas die cuts I had cut but had not colored or assembled.  I decided to roll up my sleeves and use a few of these odds and ends on my cards today.  

If you caught the Black Friday sale, there were several fun large sentiments in the release.  This got my crafty mind churning and I thought I would pair some of my CottageCutz Christmas dies with these new large sentiments to create a couple post-holiday cards.

I've linked all of the items I used on my two cards below, but you can see how they came together and enter to win one of the sentiment dies by watching the video.  I hope this gets your crafty mind churning too and you continue to find ways to use some of the beautiful Christmas dies after the season ends.

Until next time....Marla


Wednesday, September 27, 2023

"Old Fashioned Ornament"


I'm super excited to share today's CottageCutz YouTube video with you.  As you know, the highly anticipated CottageCutz Christmas release is here and there are five, yes five amazing retro ornament dies within the release.  I thought it might be nice for you to see the scale of each of the ornaments and then build a few simple Christmas cards using a few of the new dies. I have shared a "teaser" card above. If you would like to see the ornaments assembled and get a better sizing perspective head on over and join me.  I will also be sharing how you can enter to win one of these beautiful dies.

I will link the products I used in my video below for easy shopping.  Until next time... Marla


Wednesday, May 31, 2023

Faux Die Cut Inlay


Hello, crafty friends, Marla here with another CottageCutz YouTube video tutorial.  I love the inlay die cutting technique, but sometimes the work involved can be a little daunting.  My card today features a cheat for this technique that gives the appearance with less work.  The technique is one that any card maker can achieve, and it worked well with the beautiful "Spring Butterflies" die.  

I would love for you to join me today over on our YouTube Channel and after watching, I hope you give the technique a try.  There's also an opportunity to win the "Spring Butterflies" die, which is an added bonus.  

Don't forget to check out the new "Folk Art" release that just dropped at the Scrapping Cottage.  It's a magical new collection you don't want to miss.

Until next time..... Marla 


Friday, March 24, 2023

Faith Based Easter Card


Hi, it's Marla sharing a card I created using the new CottageCutz "Easter" release.  I think this release is amazing! Choosing which dies to use first was a difficult decision because I love every die.  After much consideration, I settled on the beautiful "Spring Lilies" and paired them with the "Cross w/ Draped Cloth.  I thought the two dies really complimented each other and would make a beautiful faith-based Easter card.

I began by cutting the images from Bristol Smooth cardstock.  I wanted to watercolor with my Zig Clean Color Real Brush Markers and have found that this paper works best for a smooth blend.
What stood out to me right away was the amazing, embossed texture in the cross.  The textured wood appearance is beautiful and the addition of the cloth is such a lovely touch.  I paired Dark Brown/Dark Oatmeal and Deep Violet/Light Violet markers for the cross and cloth. This was easy watercoloring with the Zig Markers.  I added my darkest color to the edge and the lightest color inside that line.  With a little bit of water on my brush, I dragged the ink to the center of each image.  Once the pieces were dry, I secured the cloth to the cross with glue.


Next, I worked on the lilies. I wanted a high contrast, and I thought orange Tiger Lilies would be beautiful surrounding the purple in the drape.  I started with my Bright Yellow Zig Marker adding the color to the left and right side of each petal. I added a touch of water to my brush and pulled the ink toward the center, leaving a little white space.  Tiger Lilies have a beautiful dark orange at the tips and centers, so I added Deep Vermillian to these areas.  On the buds, I added the color to the v's where the petals met and followed any embossed lines.  I added more Bright Yellow again to add more depth of color.  To finish off the petals, I used a Copic multi-liner pen and added small dots to the centers of the petals.  I used Dark Brown with a little Bright Yellow markers on the stamens and Smoky Yellow/Ever Green for the leaves.  I have included a short video on the CottageCutz YouTube Channel if you want to see the watercoloring process for the flowers. 


There is one lily that needed to be assembled.  I simply looked at the photo on the packaging to see how the petals should be arranged.  I should note that I did need to cut out an additional stamen for the third open flower and I cut two additional stems for my flowers.  Instead, of following the design on the packaging, I planned to arrange the lilies around the cross, so I needed a few additional pieces.


I had an A2 top folding card base with stenciling on my desk.  I had created it for another project but didn't use it. It was perfect for this card. I had partially stenciled the design from the bottom right to upper left corners and then added a soft coat of the same color ink on top of the stenciling.  Once I arranged and adhered the die cuts, I used a stamp from my stash to add a sentiment to finish the card.


Thank you so much for stopping by today.  I've linked the products I have used below.  
Until next time....Marla


Wednesday, March 22, 2023

Happy Birthday!


Hello, my crafty friends.  It's Marla here today bringing you another CottageCutz YouTube video and GIVEAWAY.  I am featuring one of my favorite scene building techniques and a coloring tip to help add the illusion of dimension to your white die cuts.  

I will link all of the CottageCutz products that I used on this card below for easy shopping, but I hope you'll join me on our YouTube Channel

Until next time...... Marla


Wednesday, March 08, 2023

Dress Up Your Die Cuts


Hi my crafty friends, it's Marla back with another card share.  Easter is right around the corner and it's my favorite holiday for so many reasons.  One being, it's when all of the beautiful colors begin to show themselves again. For today's card I mixed several dies from The Scrapping Cottage to create a beautiful, yet playful Easter card.  


The "Flowers and More" release had so many floral and foliage dies that work well together to create amazing floral swags and clusters.  I wanted a colorful card, so instead of coloring the leaf die cuts in traditional greens, I used non-traditional color combinations.  If you look carefully, you'll see I included all of the colors of the rainbow on this card for a bright and vibrant touch.

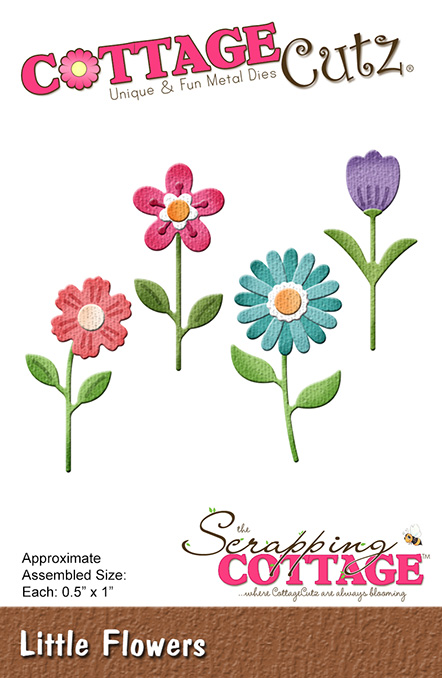
I hope you will head over to the CottageCutz YouTube Channel to see how this card came together.  I will also be giving away the "Little Flowers" die.  I provide all of the information on how you can win in the video. I have also added all of the products I used below for quick and easy shopping.

Until next time..... Marla


Sunday, October 16, 2022

Vintage Halloween Card


Hi my crafty friends!  Marla here to share a card I created using dies from the new CottageCutz Halloween release.  I followed a sketch from my friend Kendra's card challenge for the layout.  I used pattern paper from my stash to follow the simple design.   The sketch called for a 2.75" x 2.75" square that gave me the perfect place to build a scene.

For the Halloween scene I used the "Jack-O-Lantern Witch" die and inked the pieces with various Distress Oxide inks.  The sketch called for a shape to be in the upper right-hand corner of the square, so I knew the "Web" would fit perfectly with the theme. I cut it out with vellum.  

After assembling all of my images I adhered them to the card adding foam tape behind the pumpkin witch and a double layer behind my cat.  I still felt like the scene needed something else, so I added one of the ghosts from the "Haunted Ghost House" die and tucked it behind the pumpkin and above the sweet cat.

If you would like to see more details, you can head over to my YouTube Channel MAD About Cards and Crafts to watch.  

Thanks for stopping by today.  Until next time....Marla