Saturday, October 07, 2017

Give Thanks

Hello Scrapping Cottage friends! Thanks for taking the time to stop and visit today. It's Mary Marsh here bringing you the Saturday edition of the Blog.

Just as a reminder, CottageCutz has a new release of Halloween & Christmas dies that are now available in the online store for ordering. The DT has been showing lots of great samples and will continue to show them over the next couple of months to get your creativity flowing. There are plenty of beautiful new Christmas dies  and something for everyone's tastes.

Today, I used a new Christmas die, Pine Spray, to create a Thanksgiving card. I  love celebrating the Thanksgiving holiday and making Thanksgiving cards to send out to family and friends.  So let's get started with some details on how I created my card.

Step 1. I found this Give Thanks word already die cut and placed on vanilla cardstock. The words are cut in a rich, purple shade and popped up on fun foam It gives great dimension. So that determined the other colors I would use on my card. The card base is the purple and my layering panel is a curry color. I think they make a great fall combo.
Razzleberry Card Base: 4 1/8" x 5 1/2"
Curry Layering Panel: 3 3/4" x 5"
Image Panel: 3 5/8" x 4 7/8"
Step 2: Since this is a fall card I wanted some fall leaves in addition to the other elements. I cut 3 leaves from the Pine Spray die in white cardstock. I sponged with various distress inks and then pressed them into a Versamark ink pad and clear embossed.
Step 3: Again using the Pine Spray die, I cut the pine cone and some sprigs. I cut the pinecone in 2 shades of brown cardstock and the sprigs in a cinnamon cardstock.
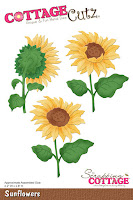
I also used the Sunflower and Wheat Stalks dies- these are older CottageCutz dies- for additional elements on my cad. The sunflower is cut in curry cardstock and the center is razzleberry cardstock. For the wheat, I used a kraft cardstock and then sponged with some fossilized amber ink. 
Step 4: On this step, I figured out the layout for all my die cut elements and adhered them to the image panel. Used dimensional adhesive on the sunflower to left it from the background. On the other elements I used glue dots and multi matte adhesive.
I attached it to the curry panel with double sided tape.
 
To complete my card, I attached it to the Razzleberry base and then scattered a few sequins. I hope I have given you an idea on a way to user the Pine Spray die other than for Christmas. Well, that's it for me for this week. See you next Saturday.
Dies I used to create card:
 
http://www.scrappingcottage.com/cottagecutzpinespray.aspx

http://www.scrappingcottage.com/cottagecutzwheatstalks.aspx

http://www.scrappingcottage.com/cottagecutzsunflowers.aspx
 
http://www.scrappingcottage.com/cottagecutzgivethanks.aspx


Friday, October 06, 2017

Let It Snow!

Happy Friday!  It's Jeanne posting today.  This card uses two dies from the new release.
I started with an 8 1/2 by 5 1/2 piece of white card stock that I scored and folded at the 4 1/4 inch mark.  Next I cut a panel that was slightly larger from Strathmore Mixed Media paper. I used a craft mat to wipe ink on direct from the pads, sprayed it with water and dipped the mixed media paper into it.
I did this several times, using a heat gun to dry between dippings.  When I was satisfied with the background, I cut the panel to 4 1/8 x 5 3/8 inches.
Next I cut three ornaments from Soft Sky cardstock and one from Whisper White cardstock.  I stacked and glued the three blue ones together and topped it with the white.
When that was done I cut out three snowflakes from the Soft Sky cardstock and used Wink of Stella on top of the snowflakes and ornament.  I used three coats for lots of shimmer!  Then I glued the snowflakes to the front of the panel.
The sentiment was heat embossed in silver on a piece of velum that was 1 1/2 inches wide and a bit larger than the width of the watercolored panel.  I wrapped velum around the panel around so I could adhere it to the back.
 Finally I added a piece of silver cord to the top of the ornament and glued that in place.

http://www.scrappingcottage.com/cottagecutzsnowflakeornamentelites.aspx

http://www.scrappingcottage.com/cottagecutzsnowflakesset.aspx

Tomorrow is World Cardmaking Day - I hope today's post encourages you to be creative and make a card tomorrow!


Thursday, October 05, 2017

Gingerbread Man!

Good Morning Cottage Cutz Friends,

It is Pam sharing with you today on our blog!
Our store is open and ready for you to check out all of the new release dies and stamps!

I am working with one of our new release dies and it is the cutest gingerbread man I have ever seen!

 1.  Use an A2 white card base cut a slightly smaller piece of DP dark brown and a piece of designer paper 4 x 5
 2.  Use the Gingerbread Baking Set die and cut the gingerbread man out of DP and the other pieces from white, blue, silver and red
 3.  Glue the pieces together add small rhinestones for the eyes and real buttons.  Ink the edges of the pieces using TH inks.  Cut out a white circle using the Nested Stitched Scallop Circle set
 4.  Add a ribbon to the DP and glue to the front of the card as shown
5.  Pop up the gingerbread man and his mixing bowl as shown below and your card is complete

Cottage Cutz Products


Thanks so much for stopping by and be sure to check out all of the new dies and stamps!

Blessing 
Pam


Monday, October 02, 2017

Bluebird and Morning Glories

Hi, Lois here today with one of CottageCutz new bird stamp/die sets.  It is now available on the website, along with new Halloween and Christmas dies.  Be sure to visit the store and see what they have to offer.  My card today was made using the Bluebird and Morning Glories stamp and die set.


Like Mary Marsh has done so many times, I started creating my card using a Sketch Challenge layout from Splitcoaststampers.  This sketch was from several weeks ago.


Sometimes with brand-new stamps you have a little difficulty getting the ink to stamp evenly on the first go-round.  One of the reasons I love the MISTI is that you can re-stamp an image several times until you're happy with the result.


After getting a good stamped image, I colored the bluebird and morning glories with my Copic markers.  I like to do my coloring while the image is still in the MISTI in case I need to restamp the image after I'm finished.


I then die cut the image and also cut an oval, using the largest Nested Stitched Eyelet Oval die.


Then I cut my cardstock.  The card base is heavyweight white cut at 5 1/2" x 8 1/2", scored at 4 1/4", and the patterned paper is cut at 4" x 5 1/4".  I liked this patterned paper because it picked up several of the different shades of blue from my bluebird.


I then started the construction of my card, adhering the patterned paper directly on the card base but popping the die-cut bluebird on large foam pop dots.


I stamped my sentiment on the edge of the same pale aqua cardstock as my oval and, using a scrap of white cardstock, stamped one of the morning glories, which I colored and fussy cut.


I then adhered the sentiment panel flush with the left side of the card below the oval and popped up the morning glory on a foam pop dot at the end of the strip (where the heart appeared on the original sketch).  And I was finished!


I hope you check out all the new items in the CottageCutz store.   The holidays are just around the corner!!!

CottageCutz dies used on my card are:

http://www.scrappingcottage.com/cottagecutzbluebirdandmorninggloriesstampanddie.aspx


http://www.scrappingcottage.com/cottagecutznestedstitchedeyeletovalset.aspx


Sunday, October 01, 2017

Haunted House Card

Hi!

This is Anja again. Today I played with new Halloween dies and made my first Halloween card ever :) Given the fact I only have two Halloween dies I tried to do the most of it. And I had to use my favourite inks again. I made a haunted house scene and a big moon in the background.


For the card I used:
- Distress Oxides (Black Soot, Wild Honey, Fossilized Amber, Faded Jeans, Wilted Violet, Seedless Preserves),
- black card base (13,5x13,5 cm),
- watercolor paper (12,8x12,8 cm),
- black and white card stock for die cuts,
- white pigment ink pad,
- water mister,
- paper glue. 

First I die cut the house, phrase and ghost from black and white card stock.


Then I made the background. I colored the night sky with four different shades. I started with the violets on top and then went to black on the bottom.


I cut a circle out of it. 


I colored the moon then. I used a little bit of black on top of the yellow.


Then I spritzed both papers with water. I splashed bigger drops of water on top of the moon background. 


Then I used a bit of yellow around the circle to make it look like the moon is shining. The Oxides are perfect for that. 

And then I just glued all the pieces together and made a little shine to the ghost inside the card. 


And this is my first and simple Halloween card.


Do not forget to check all the new dies. You can still get them with a 25 % discount. 

Enjoy your Sunday and see you again next week. 
Anja Z.