Friday, March 16, 2018

CAS Easter Card

Happy Friday, it's Jeanne posting today.  I'm a big clean and simple (CAS) design fan.  Many of my cards are in that style.  When doing a CAS design I love using dies because they come out so crisp and graphic, keeping everything - clean and simple!  My card this week illustrates that.
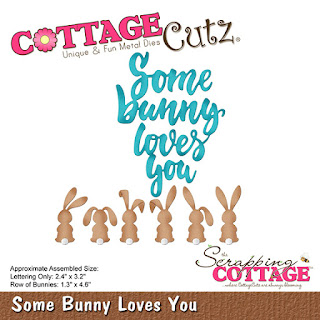
These little bunnies from Some Bunny Loves You are adorable and highlighted perfectly by the color offset squares.
Out of white cardstock, I made an A2 side fold card base, then embossed a panel 4 1/4 x 5 1/2 inches and adhered it to the base.  I used this basket weave since I thought it perfect for that "Easter basket" look.
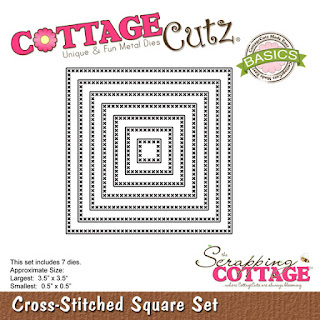
Next I die cut the bunnies from Sahara Sand and three squares each from white, yellow, pink and purple.  I used the third smallest square from the Cross-Stitched squares set.
I used a sponge dauber and Sahara Sand to edge the bunnies.  Then I glued on their little white tails.
For each of the three colored squares, I stacked and glued them, then offset a white square and glued a bunny on top.  Then it was time to glue them to the card front.  It was fairly easy to line them up on this card since the basket weave gave me a natural alignment tool!  A tip when lining up three items - do the top and bottom first then center the one in the middle.
For the sentiment I used a fourth color and die cut the Happy Easter Egg.  I love the playfulness of the font used in this die.
Using paper snips, I cut out the sentiment and adhered it to the front of the card.

Dies used:
http://www.scrappingcottage.com/cottagecutzsomebunnylovesyou.aspx
http://www.scrappingcottage.com/cottagecutzhappyeasteregg.aspx
http://www.scrappingcottage.com/cottagecutzcross-stitchedsquaresetbasics.aspx

Thanks for stopping by today.  Have a fun and creative weekend!


Thursday, March 15, 2018

Bee Happy!

Good Morning Crafty Friends!

It is Pam from Stamper at Heart Blog sharing ideas with you!  Before we get started I wanted to remind you that we are having a sale in our online store!!  So don't miss out!!
Now onto today's project! I am using the new Collection In Stitches.  If you haven't checked out this collection please take a peek it is just adorable!
Designer Steps:
 1.  Cut a white piece of card stock 4  5 1/4 use a hexagon stencil to add the honey comb to the top of the card
 2.  Cut a piece of DP 3 1/2 x 4 and glue to the lower half of the card
 3.  Using the largest die from the Pierced Wide Rectangle Frame Set and cut out of white card stock save the inside piece
 4.  Before you glue the frame to the front of the card add the black and white twine
 5.  Use foam tape on the rectangle frame and pop to the card as shown

 6.  Cut all of the pieces from the Stitched Honey Bees die out of white card stock
 7.  Use copic markers to shade and color the bees and hive.  On the inside retangle stamp bee happy then glue the retangle flat to the center of the frame
 8. Cut the wings out of vellum.  Glue the hive and little bee trails to the card then add the bees and sequins to finish

Cottage Cutz Products


Thanks for stopping by and please remember to stop by our store for the awesome sale!
Blessings
Pam


Wednesday, March 14, 2018

Stitched Fruit Thank You Set


Hi everyone! It's Janet here to show you a set of thank you cards for the spring season. I have really enjoyed working with the dies in the new In Stitches collection. There is so much to choose from and they can be used year around. I am a huge fan of the stitched look so these are right up my ally!

Today's set of five cards feature the delicious Stitched Fruit dies. Here you will find a lemon, apple, pear, strawberry and cherries. These are nice sized dies when assembled and were perfect as the focal points for my card set. They would be awesome on tags also.


The Thanks sentiment is cut from the Stitched Alphabet set. The entire alphabet cuts out at once and are a nice chunky size at 1" tall for words or short phrases on your card projects. The letters would also work wonderfully on your scrapbook layouts. There are matching numbers to match the letters although I didn't use them in today's project.

The circle die cut comes from one of my most favorite shape sets, Nested Wacky Stitched Circle Set. To create a little additional interest, I trimmed about 3/8" of the circle off and butt it against a narrow green strip and a red embossed strip of card stock.

Please click on the video thumbnail below or this link to watch how these cards were created.


Thanks for stopping by to get some inspiration for your projects. Have a crafty day!

Dies Used In This Card:


Tuesday, March 13, 2018

Rise & Shine Card Samples - Part 2

 
Hello Scrapping Cottage friends! Thanks for taking the time to stop and visit today. I have some exciting news to share. There is a brand new release of dies. It's our Rise & Shine release and the designs are currently on sale for a limited time at 25% off the retail price.

So many cute breakfast and made with love themed dies. The design team has put together some cute samples to give you some ideas on how to use these dies. We showed some samples last Tuesday- click here to see those.

So let's get started with the samples for today.

Card 1: This first sample is a card from Janja Albreht. She used the Skillet w/Eggs & Breakfast Plate dies to create a beautiful invitation to brunch. The food looks delicious - anyone want to hop on a plane to Slovenia and surprise her for brunch?
Card 2: Our next sample is a card from Lois Bak. She used the pastry goodies & made with love phrase dies and created a cute cherry pie card. ,How perfect would this be for when you do some special baking for gift giving.
Card 3: Our next sample is a card from Jeanne Knobbe. She used the Rise & Shine Phrase die and stenciled a beautiful sunrise background to compliment the images. This card could be used for a variety of occasions such as birthday, thinking of you and even an encouragement card.
Card 4: Our next sample is a card from Pam MacKay. She used the Kitchen Chef dies to create a really cute card. This one could be used for a homemade goodie gift. Or by simply changing the sentiment as a Mothers Day card or a way to congratulate someone who is taking their first cooking class, or a thinking of you for someone who loves to cook. Lots of options with this die.

That's the samples for this week. I will have another set to show on Tuesday, March 27th. Hope these samples have sparked some ideas in ways you could use these dies. They are currently 25% off for a limited time in the online store.

Dies used to create cards:

http://www.scrappingcottage.com/cottagecutzskilletweggs.aspx

http://www.scrappingcottage.com/cottagecutzbreakfastplate.aspx

http://www.scrappingcottage.com/cottagecutzpastrygoodies.aspx

http://www.scrappingcottage.com/cottagecutzriseandshinephrase.aspx

http://www.scrappingcottage.com/cottagecutzkitchenchef.aspx

Monday, March 12, 2018

Easter Basket

Hi, Lois here.  Easter is just a few weeks away, so for today's post I made an Easter card.  I had bought a pad of patterned paper a few weeks ago at Hobby Lobby that had several pieces that looked just like a woven basket, and I've been wanting to use it.  Today is the day!   My card, using one of the Spring dies (Spring Flower Eggs), is pretty simple.


To start, I cut the eggs three times -- from yellow, pale green, and purple cardstock.


Using a fine-tip glue applicator, I glued the cut-out eggs to the solid back pieces, alternating the colors.


Then I cut my cardstock:

Cream - 8 1/2" x 5 1/2"
Patterned paper - 2" x 5 1/4"

The handle was cut from tan cardstock, using the largest CottageCutz Pierced Wide Oval Frame die.


Using a wide-angle corner punch, I rounded the bottom corners of the basket-weave patterned paper.


I wrapped some purple ribbon around the oval frame/basket handle, taping it in place.


I taped the handle to the back of the basket and added the eggs.  Then I adhered some foam tape strips around the basket and the frame.


Removing the protective paper from the tape, I adhered the basket to my card base.  I added a large foam pop dot behind each egg and a strip of ribbon and bow to the basket, and my card was finished.


By the way, CottageCutz has a new release of some cute breakfast items called Rise and Shine.  They are currently on sale at 25% off.  Be sure to check them out.

CottageCutz dies used on my card are:

http://www.scrappingcottage.com/cottagecutzspringflowereggs.aspx

http://www.scrappingcottage.com/cottagecutzpiercedwideovalframesetbasics.aspx